 |
In part 1 of this blog we moved the masterdata from the Decision to the Integration. In this blog we take the next step by retrieving the masterdata from a VBCS Business Object. |
In the previous blog we ended with a hard-coded mapping in the ICS integration to the Decision service.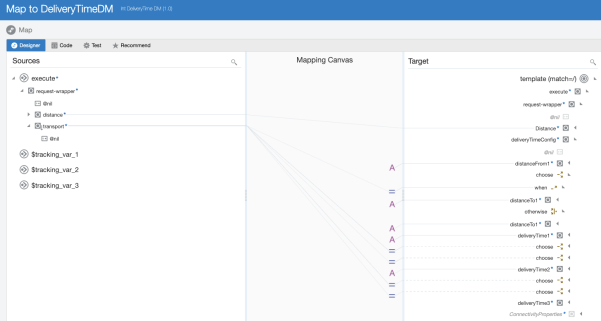
But moving the hard-coded data from the Decision service to the Integration is a waste of time. Or according to a Dutch saying “lead over old iron”. Again, a component must be reactivated in case of changes in the value of the variables.
In the remainder of this blog we will adjust the integration in such a way that the values of the variable are retrieved from a VBCS Business Object. Changes to the values in the BO are immediately active without having to activate one of the components.
For this, we must roughly go through the following steps:
- Create the Business Object (BO)
- Add variables to the BO
- Get the REST endpoint of the BO
- Create the invoke Connector
- Update the Integration
- Activate the Integration
- Test the Integration
Create the Business Object
We have defined the following BO in VBCS
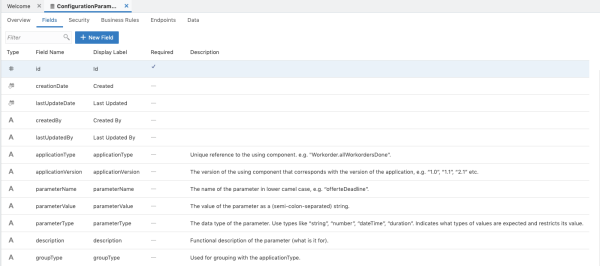
Let’s pick out a few fields that are particularly important for our business case.
- applicationType: this field is used to select a specific operation / service from the Decision Model. For our DM this will be ‘Deliverytime.calculateDeliveryTime’
- parameterName and ParameterValue: for example distanceFrom1 = 0
- groupType: groupingfilter. We will use this to select by ‘means of transport’.
Add variables to the BO
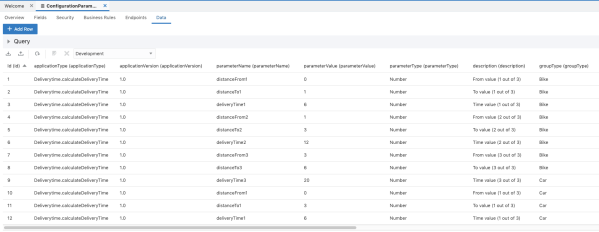
Next, we must enter the variables with corresponding value in the BO. For each means of transport (var1) the variables are specified.
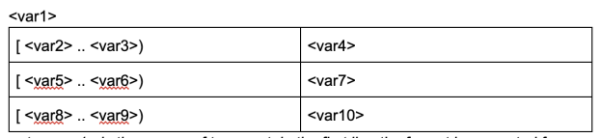
Part of the data entered is shown in the image below. <var2> till <var10> are line 1 till 9 in the table below.
Get the REST endpoint of the BO
Select, depending on the environment, the correct endpoint from the endpoints tab.

Create the invoke Connector
Use this endpoint to create the invoke Connector. If you don’t know exactly how to do this, I refer to an earlier Jarvis blog (Using a DM in ICS) describing this.
Update the Integration
The connector must then be added to the integration. Place this at the beginning of the chain. The corresponding mapping step is added automatically.
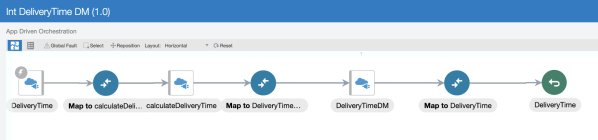
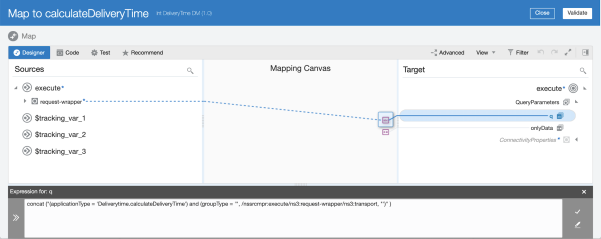
Next, both the incoming and outgoing mapping of the connector must be implemented. On the incoming side, using the ‘q’ parameter, a selection filter is defined on the data in the BO.
concat ("(applicationType = 'Deliverytime.calculateDeliveryTime') and (groupType = '", /nssrcmpr:execute/ns3:request-wrapper/ns3:transport, "')" )
On the output side we have a list of name-value parameters. Based on the name, the correct value must be linked to the correct variable. For example:
IF ns11:parameterName = "distanceFrom1" then distanceFrom1 = ns11:parameterValue
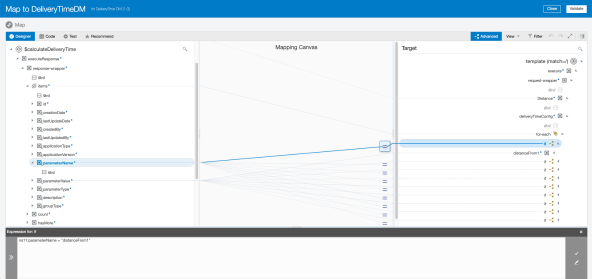

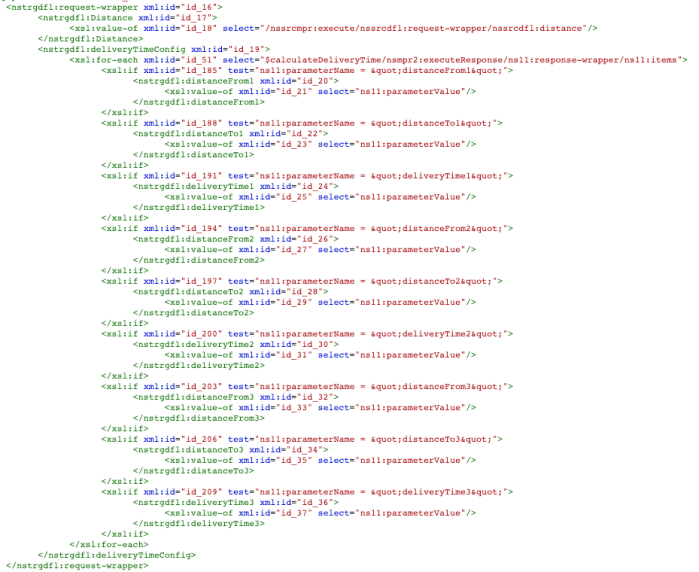
To clarify the source code
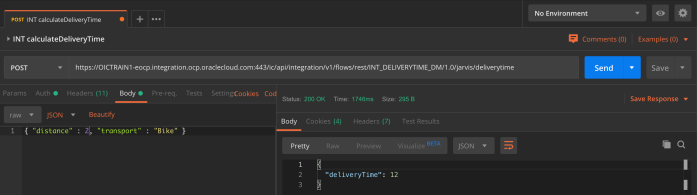
Activate and Test the Integration
This is done in a similar way as in the Using a DM in ICS post. And if everything went well, the outcome has not changed either
If one of the variables now changes, this can be done in the BO. The integration will immediately use the changed value. The integration does not have to be reactivated.
Next step
In this blog we described how to retrieving the masterdata from a VBCS Business Object. In the following blog we will expand this further with a validity period for the masterdata.

[…] manage versions …) & Using a DM in ICS & How to manage Masterdata of a DM (part 1) & How to manage Masterdata of a DM (part 2) & Managing DM Masterdata Validity Period & Input and Output Storage of Decision Model […]
[…] let’s expand our scenario (see previous blog) a little further. Currently, one of the means of transport in the Decision model is a bike. […]
[…] How to manage Masterdata of a DM (part 2) […]